This post was originally made on Guilded (feb '24), so I've mirrored it here in case it's helpful for anyone. There are a few tools available for recovering a dead or dying hard drive that I'd like to quickly share since I managed to properly do it to one the "real" way.
PhotoRec
This is the baby way - just install this suite, and use PhotoRec to grab files off the dying drive, though it WILL be messy and it WILL be unable to get your filenames back, but if there's not much on there and you don't wanna bother with too much then you could use this. There is also TestDisk bundled which could help try and repair the disk to be accessible, but it's unlikely the fix will be that easy, so I prefer the next option:
ddrescue - to the rescue
Specifically, using SystemRescue (SR). ddrescue is a command-line program for recovering data off a drive by either overwriting a surrogate drive (this will WIPE your second/surrogate drive and is for hardcore retrieval) or output it to a file (prolly what you want without wiping anything). It can output a copy of the dying drive as an .ISO, and using something as easy as 7-zip, you could view its contents or try retrieval through other methods.
To reiterate, you'll need your dying drive, a USB flash drive, and a secondary drive to recover data onto. Obviously, the secondary drive needs to be just as big, preferably even bigger than the drive that's being recovered, or you just can't save it all and run into problems. Also, the secondary drive must be formatted to NTFS, so you might actually have to wipe it if it's something like FAT32 instead. We will be doing the .ISO method, which will export a copy of the drive as one big file. FAT32 does not support files bigger than 4GB. Meaning if you try to proceed, there will be an error and you're left with a 4GB file. If your corrupt drive is somehow less than that, then I guess you could proceed... If your drive is already NTFS, then at the very least make sure it has more than enough data ready for recovery.
An example if you don't have an empty drive.
SystemRescue is specifically a Linux distribution, meant for you to write onto a USB drive to boot your computer into temporarily. It has a suite of tools, such as ddrescue, PhotoRec and a bunch of other things. HDDLiveCD also exists similarly but I think it's another thing that's too hardcore.
Before you do that, I would recommend you attach the dying hard drive as directly as possible. If it's an internal HDD or SSD, put it into the computer you'll be launching SR with instead of using a USB connector so it can interface directly (via SCSI). If you're trying to recover from a flash drive or an external hard drive or something like that, then, well, I guess you can only work with what you have. You might be able to disassemble an external HDD but you'd need to check if it looks like any other SATA drive or the like. The secondary harddrive can be connected by USB.
Once you've done that, burn SR's LiveCD ISO onto your spare flash drive (it will be wiped) using the beloved Rufus. Maybe you have to do this on a seperate computer, or do this before you shut your PC off and replace the drive with the dying one. After that, whenever you have your dying drive, secondary drive, and LiveCD drive all ready, start the PC, go into BIOS to set your USB as the first device to boot, then save and exit and watch SR boot up.
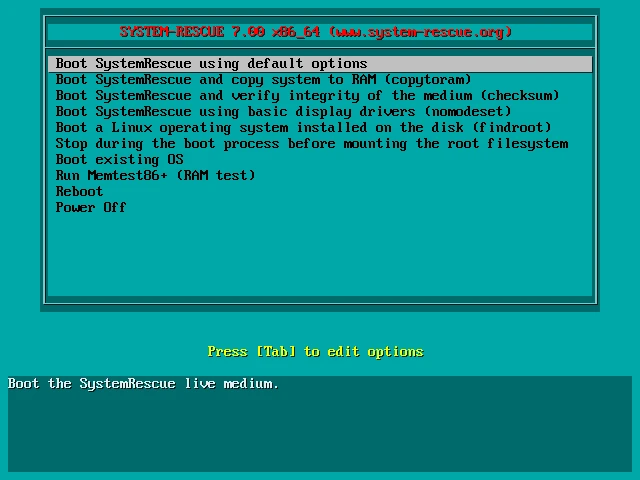
Memtest86+ can also be a fun addon to try and test your PC's RAM.
Here, use up/down to select and Enter to proceed. I would either use the first or second option, third one if you're paranoid. The second option (copytoram) will allow you to remove the flash drive after it's booted, which may be useful if you need another slot (or if you accidentally bump into the USB and remove it).
Once you boot, first thing will be a black command line asking you to do something, but if you read the screen, it says Type startx to run the graphical environment. So, you can input startx and hit Enter. You'll get booted into a graphical environment that's more familiar.
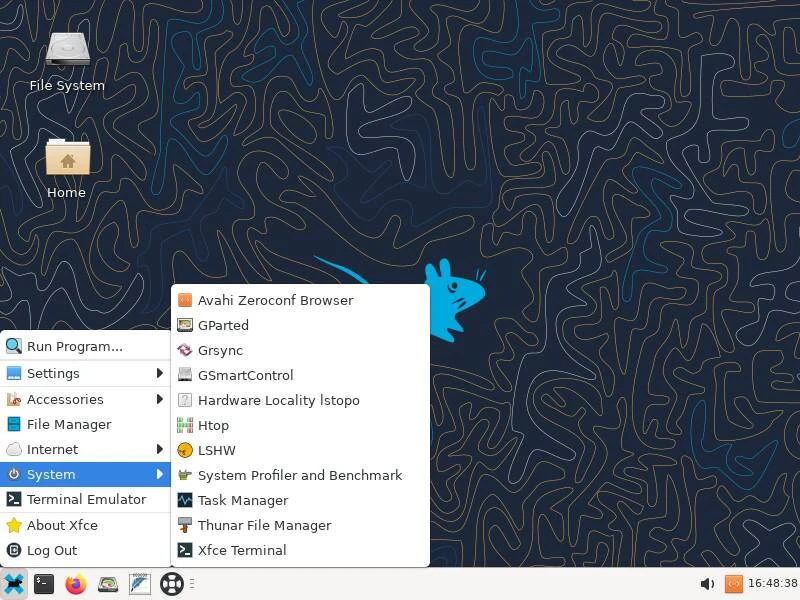
As mentioned, this has plenty of tools you can explore through with the Start button. If you haven't read it already, the system comes with a lot of documentation, which you can read offline using the black lifebuoy on the taskbar.

For now, we'll assume we're recovering a drive that had a Windows-compatible filesystem like FAT32 or NTFS. Feel free to explore the other tools to your discretion and wariness, but if you wanna get on with the recovery, we're going to be opening the terminal.

Let's run fsarchiver probe simple. You could run stuff like lsblk if you're more comfortable with it, but the former will make things easier to see. You might see an output such as this imaginary:
[======DISK======] [============NAME=============] [====SIZE====] [MAJ] [MIN]
[sda             ] [WD PIZZA3000                 ] [   250.00 GB] [  8] [  1]
[sdb             ] [USBDrive                     ] [     8.00 GB] [  8] [  0]
[sdc             ] [SG893193PASTA                ] [   600.00 GB] [  8] [  0]
[=====DEVICE=====] [==FILESYS==] [=====LABEL=====] [====SIZE====] [MAJ] [MIN]
[/dev/sda1       ] [ntfs       ] [Boot           ] [    50.00 GB] [  8] [  1]
[/dev/sda2       ] [ntfs       ] [Windows        ] [   200.00 GB] [  8] [  1]
[/dev/sdb        ] [ext3       ] [SRLiveCD       ] [     8.00 GB] [  8] [  5]
[/dev/sdc        ] [ntfs       ] [BACKUPDRIVE    ] [   600.00 GB] [  8] [  6]
Again, yours will certainly appear different, because this is a rundown of all drives connected to the computer. You may see a long nvme0n1 for example if you have an SSD. You will probably be able to make out the corrupt drive, the LiveCD, and your recovery drive by observation. The Disks are the physical, full drives, while the Devices are the partitions within these disks. For example, you probably named your secondary drive something useful, like BACKUPDRIVE, AND you can probably tell which is which by the Size of the device, and the Name of the Disk at the top (compare your models, because that's what the Name is for). The USB drive should be easily visible, and for the corrupt drive, you may be recovering a Windows OS drive, so notice things like multiple partitions on the same drive for RECOVERY and BOOT partitions (notice sda1 and sda2?).
⚠️ It cannot be stressed enough to triple-check you know which Disk is which. Compare the models, check pictures on your phone, double-check the Label names, the size, even the Filesys, all of it.
So in this case, we acknowledge that sda is our drive to recover and sdc is the drive we want to export to. This will certainly be different for your case, depending on if you used USBs differently.
With that out of the way, we should now mount and load your secondary drive so that it's accessible to the system. Do the following:
mkdir '/mnt/Backup/'
Remember to not forget / on the left side. This creates a folder called Backup in a system folder called mnt. This is where your secondary drive can be accessed and is a good place to put it to. You can change Backup and give it any name you'd favour at all, but it's preferable to keep it simple and obvious. Avoid spaces. Next, since we know sdc is the drive of this disk:
mount /dev/sdc '/mnt/Backup'
This mounts the device on /dev/sdc (look at my fake example table) into the Backup folder we just made. If your external drive has several partitions, then you would be seeing several versions of sdc, such as sdc1, sdc2, so on - so again, make sure you choose the right one you want to use.
You can try to use the file manager included now (click File System on the desktop) to find /mnt/Backup and access your files like this. If all is good, we can proceed.
Well, the only thing to do if you're ready to start backing things up is to go back to the terminal and:
ddrescue -d /dev/sda '/mnt/Backup/RECOVERY.iso' '/mnt/Backup/map.mapfile'
This calls ddrescue, the program that will scrape the drive and output it to your secondary drive.
-d makes ddrescue try to directly access the drive. If it doesn't work, things will just be slower.
/dev/sda is the whole Disk we are accessing, so we are going to make a 1:1 backup of it as best as we can.
You CAN choose to only export a specific partition – in the case you don't want to recover something like the additional bloated Windows partitions, you could use our example of /dev/sda2 which you can see is tied to the Windows partition above. It is up to you whether you need to recover the whole disk or if you know you only have files in a certain location. For my money, better the whole drive.
'/mnt/Backup/RECOVERY.iso' is the location where we are saving this backup to. You can choose any filename you want, but make sure you are choosing the right location anywhere in whatever you named the mount point (Backup) to.
This will not erase the disk/partition. But if you DID want to be extra and do some hardcore recovery, you can make ddrescue try to clone the disk instead of just creating a file from it, by replacing this whole argument with the device, such as /dev/sdc – but I think you need to be unmounted in the first place for this. Disregard this specific point if you don't understand the consequences of this deleting your secondary drive.
'/mnt/Backup/map.mapfile' causes a "mapfile" to be created for this process. This lets you resume the recovery whenever you want if you need to stop the program, all without needing to do all the progress from 0% the next time you do it. This can also be named whatever and be put wherever (even on another drive if you really wanted), but you HAVE to call this final argument for it if you do resume this process.
When you are ready to begin, hit Enter. This process will take a long while.
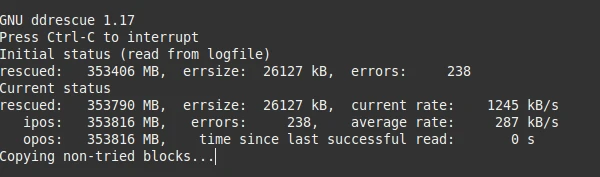
ddrescue will now take the painful steps of recovering everything it can from the drive and outputting it to the file. It will do many "passes" such as collecting data from the drive backwards and forwards. If there are a lot of errors, ddrescue will take even longer trying to scrape every single bit possible. Because of this, later passes may crawl to a rate of a few bytes per second.
You are able to stop the program with Ctrl+C and resume at a later date using your mapfile by running the same command as stated earlier. But it's possible you were like me and forgot to call the mapfile, and you need to resume your 200gb file... Now what?!
Well, you're able to call --generate-mode, which lets ddrescue smartly create a mapfile based off of your results. Simply do:
ddrescue --generate-mode /dev/sda '/mnt/Backup/RECOVERY.iso' '/mnt/Backup/map.mapfile'
to create it. See? Only one argument changed! (it doesn't allow you to use other arguments, though). When it's done, you'll have a mapfile and can resume your progress.
Therefore, you might end up leaving the computer on overnight. Or overnights. It depends on the size of your drive. If you're okay with this, then let it sit forever, but at some point, you will see a stat display a % percentage of the drive that is recovered. In my case, I've managed to get it to 99.95%, which stayed like that for a very, very long time. There is another stat that tells you when's the last time a "successful read" has been done – and that too could be as long as three hours ago. There might not be hope if the program can't read that section of the drive.
It's up to you to decide when enough is enough. Maybe you'll be able to reach 100%, but you may be content with this >99% retrieval and don't want to wait for logarithmic gains. When this is the case, you may input Ctrl+C to kill the program (safely), leaving you with your ISO and mapfile (if you'd like to give your drive a rest and try it out again later).
Once that's done... That's it. By recommendation, unmount your secondary drive by doing umount '/mnt/Backup'
You may shut down your computer, launch Windows and take a crack at it with 7-zip. You could even try using PhotoRec on it if you wanted it for the isolation, or there's other technical things you could try. But if you just want files to browse, 7-zip should be enough.
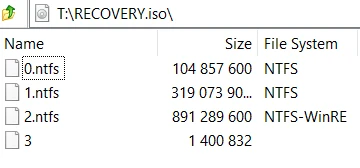
Just try making sure you open it directly with 7-zip – it might complain that the archive is corrupt otherwise.
See if you can recover your files this way. If it's enough, then congrats, you've done a good one. If there's been errors along the way, then it could be that the drive is just entirely dead.
Page last updated 8/1/2025